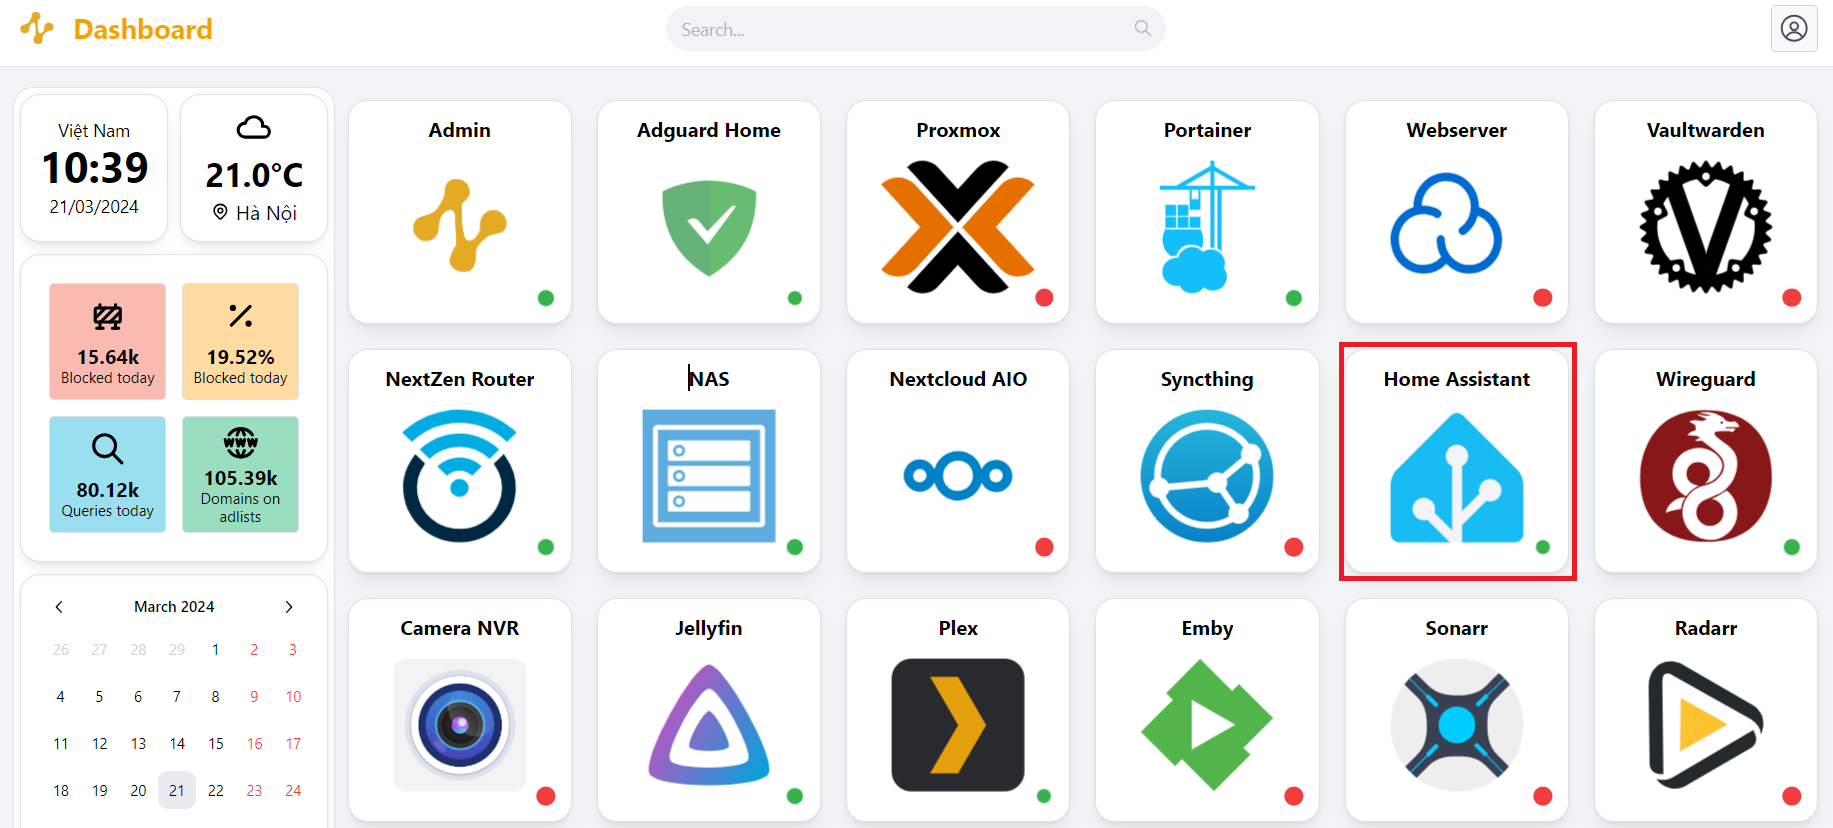
Home Assistant
Purpose: Manage smart devices in the home via LAN
Log in to Home Assistant
- Step 1: Customers Access IP address: http://10.0.0.10/board -> Home Assistant
-
Step 2: Enter Username and Password -> Sign in
-
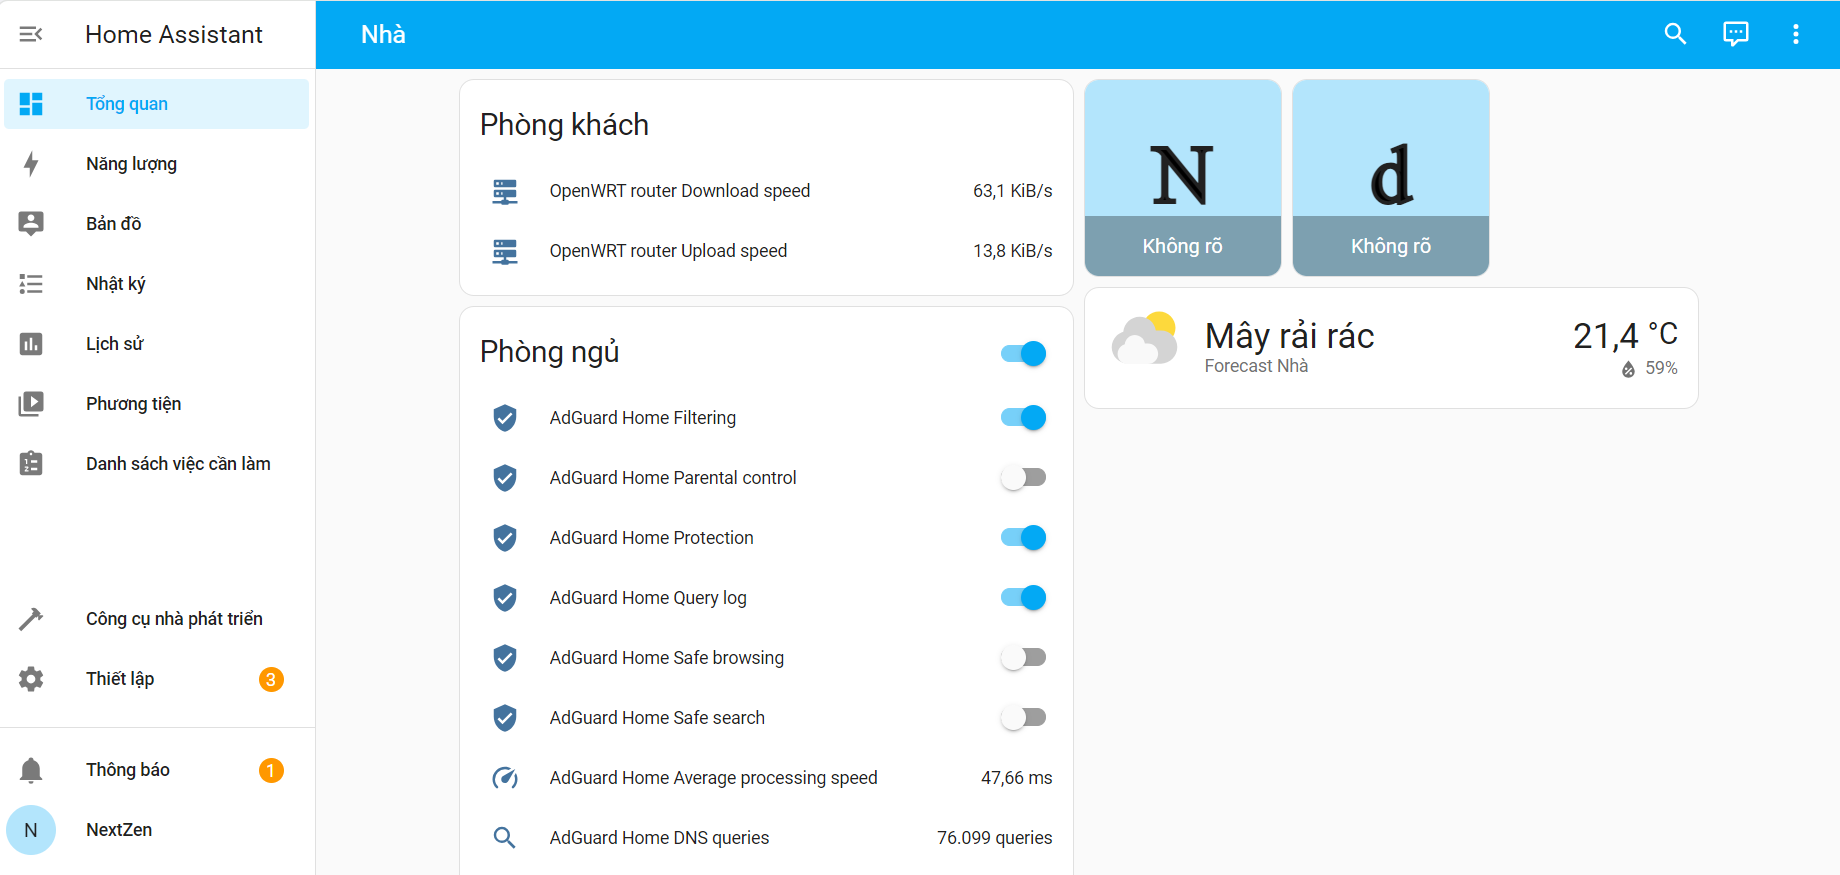
Step 3: Successfully logged in, the Home Assistant interface appears
Connect the new device to Home Assistant
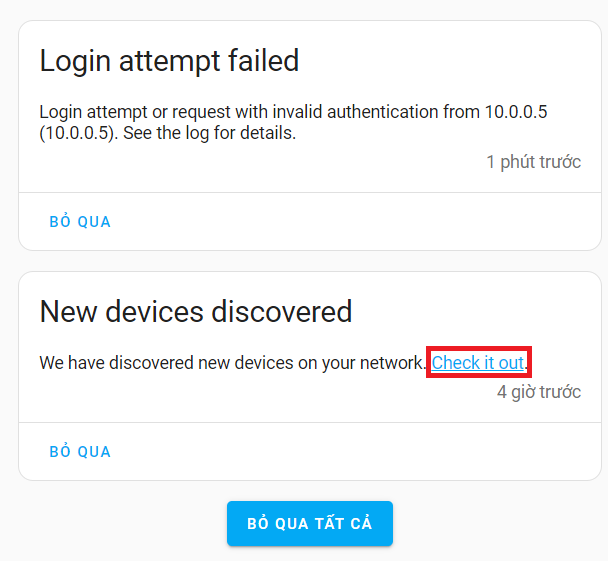
- Step 1: Select notification -> check New devices discovered -> Check it out
- Step 2: Here the interface displays the found devices

- Step 3: Configure the device (Each device will have a different configuration type)
ex: OpenWRT Router UPnP/IGD - Step 4: Select Configuration -> Send -> The interface displays a success message and confirms Completion


Connect the integrator
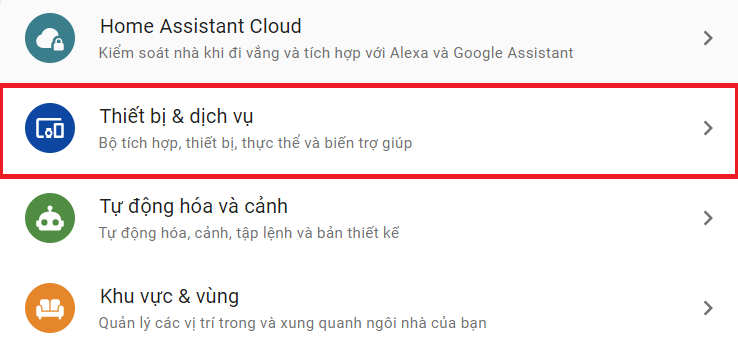
- Step 1: In the interface Overview -> Setup

- Step 2: Select Devices & services -> + ADD INTEGRATOR
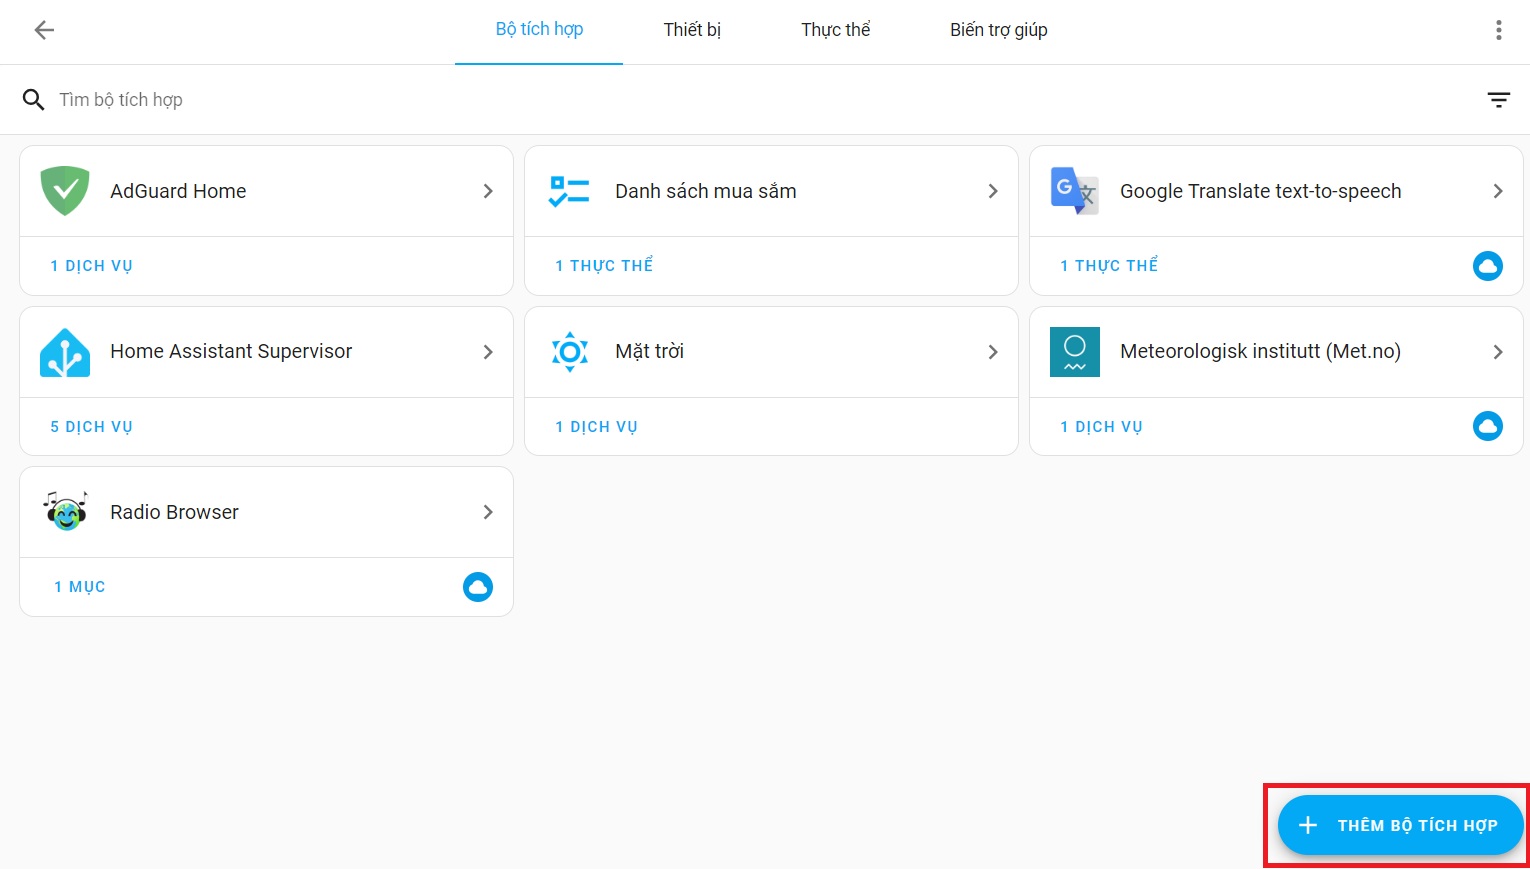
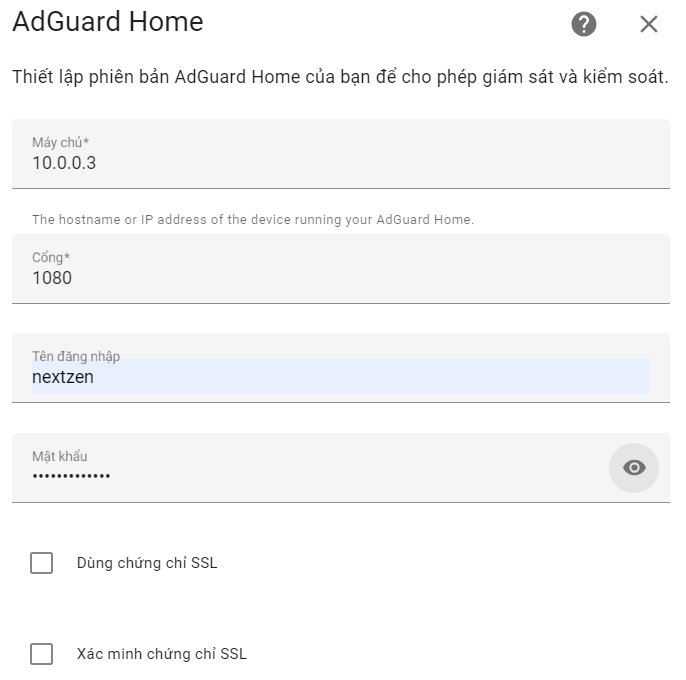
- Step 3: You can search and select supported HA devices and each device will have a different configuration (ex: AdGuard Home)

- Step 4: Enter the necessary information
- Step 5: After successfully creating, you need to select the area -> Completed
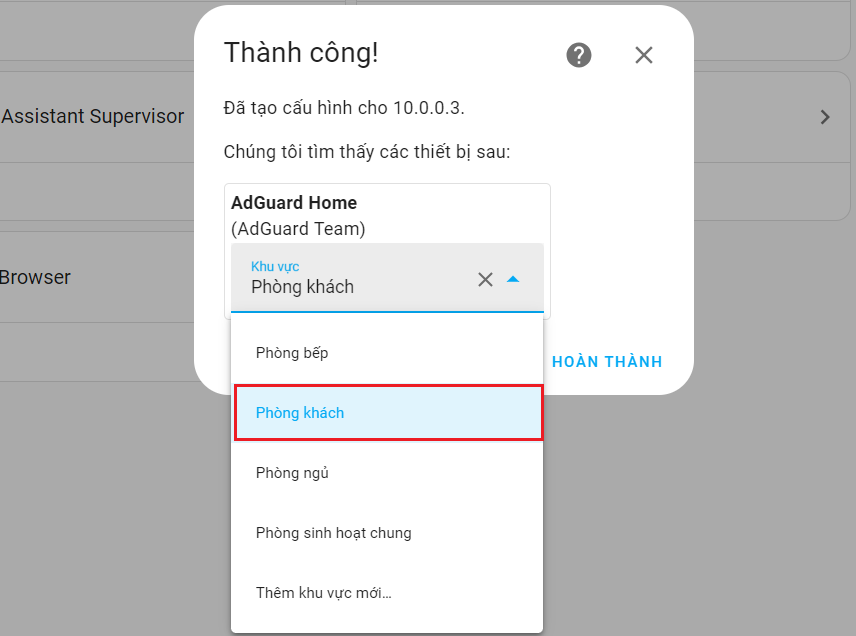
- Step 6: Once completed you will see AdGuard Home has been added
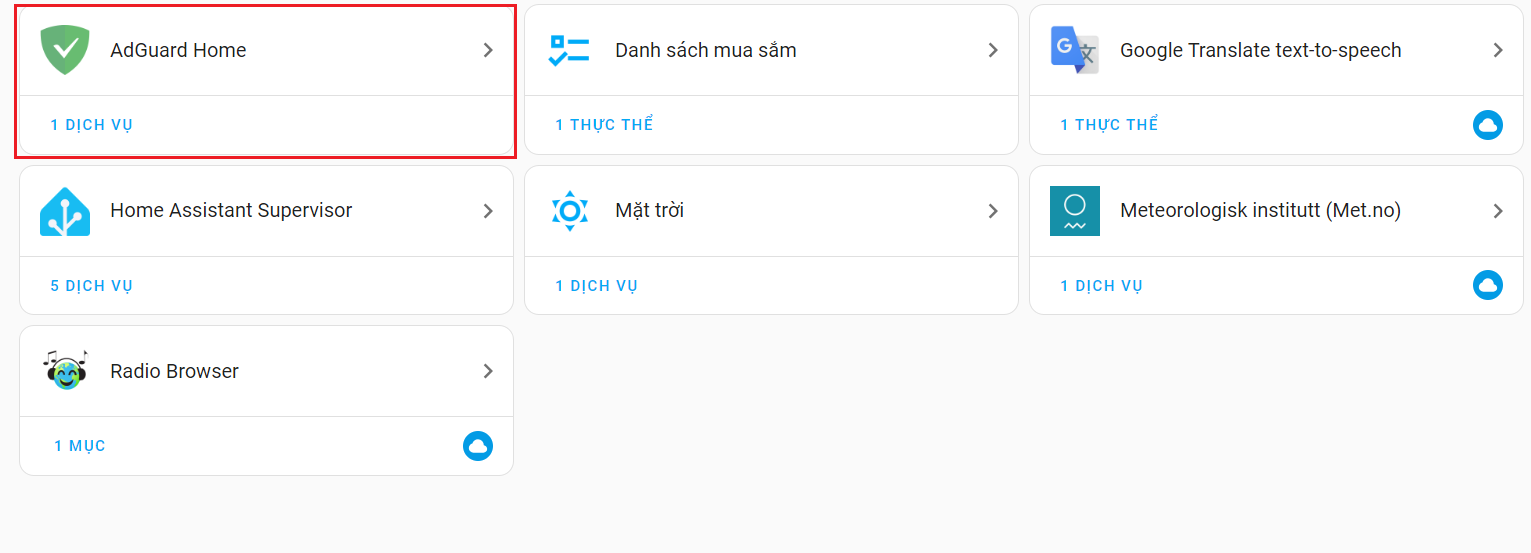
And in the Overview interface you can see AdGuard Home widgets

And you can completely control and customize it.
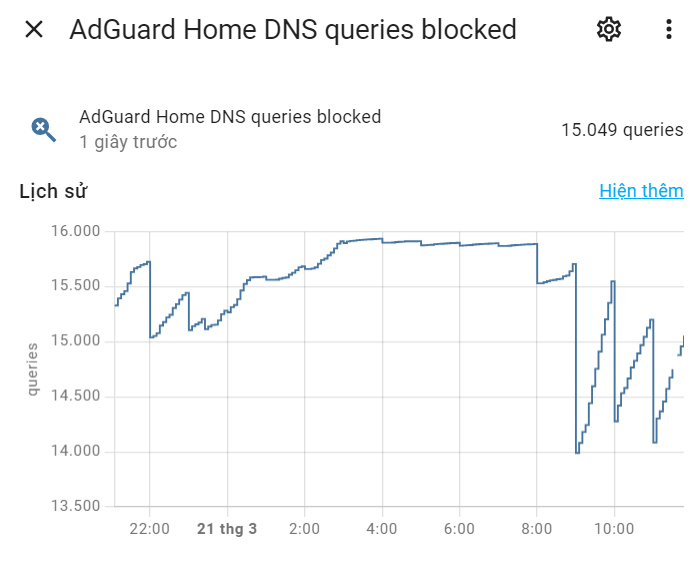
ex: Total number of ads blocked
Overview
- Show all linked devices and control them

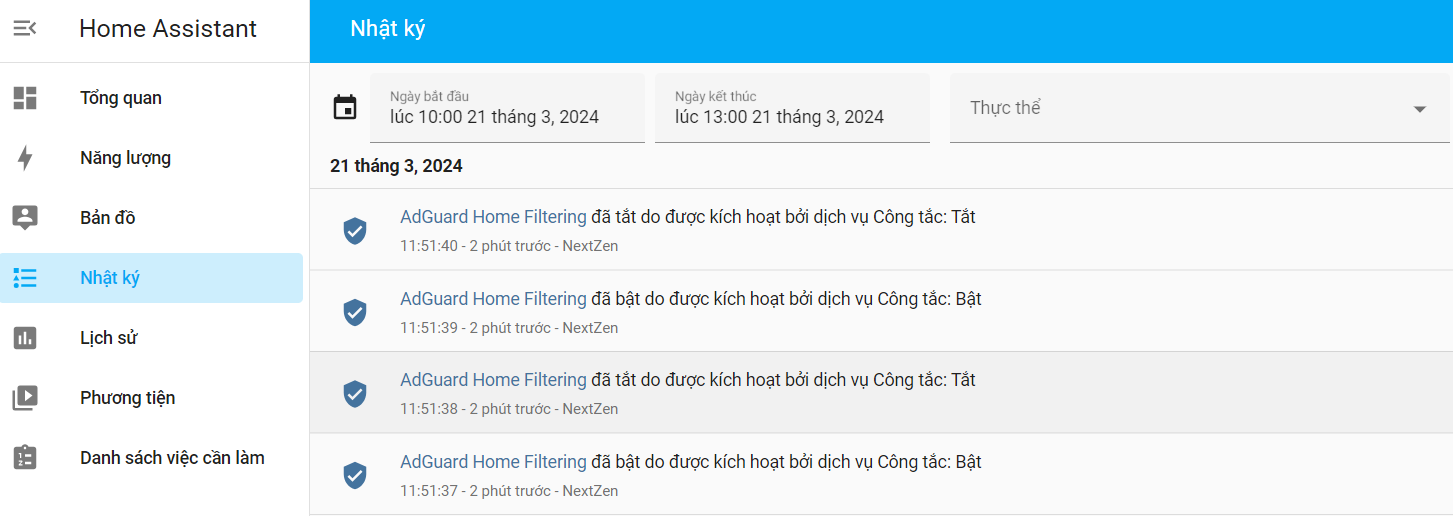
View operation log
- You select Log to view the history of operations on HA and filter to view operations as desired
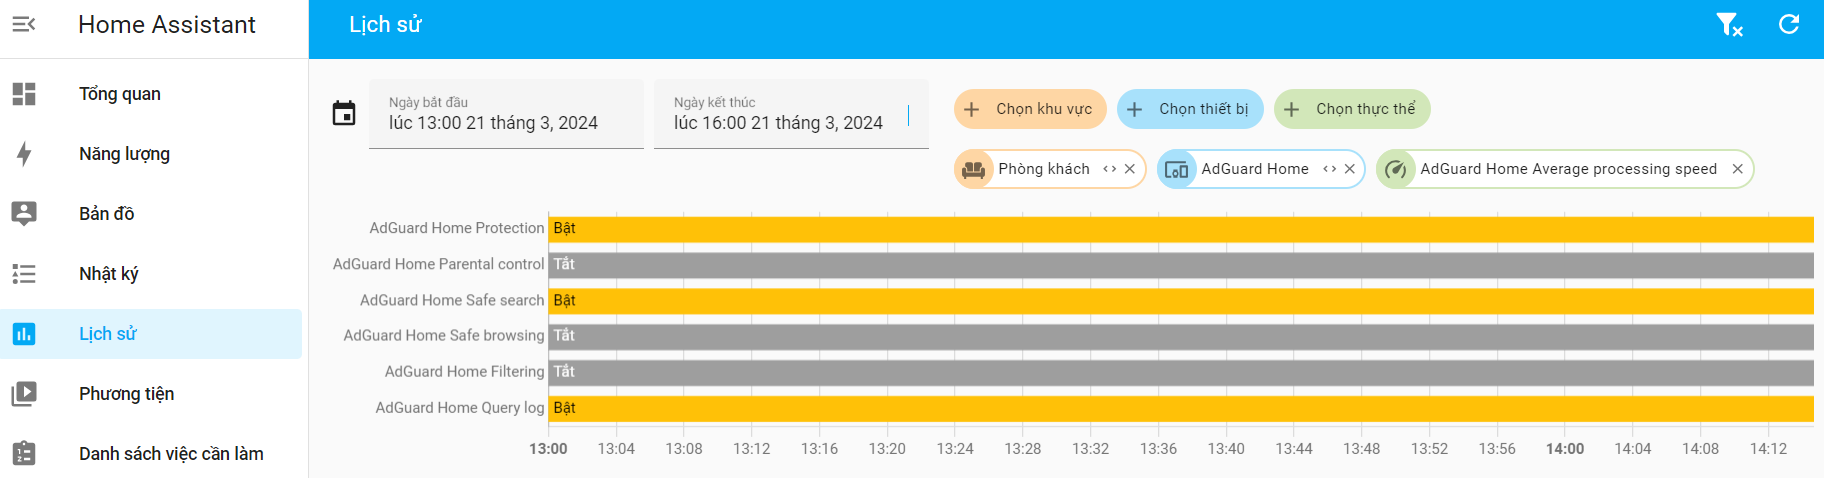
Activity history
- You select History to see the frequency and operating history of the devices and can filter by date, region, device, etc.
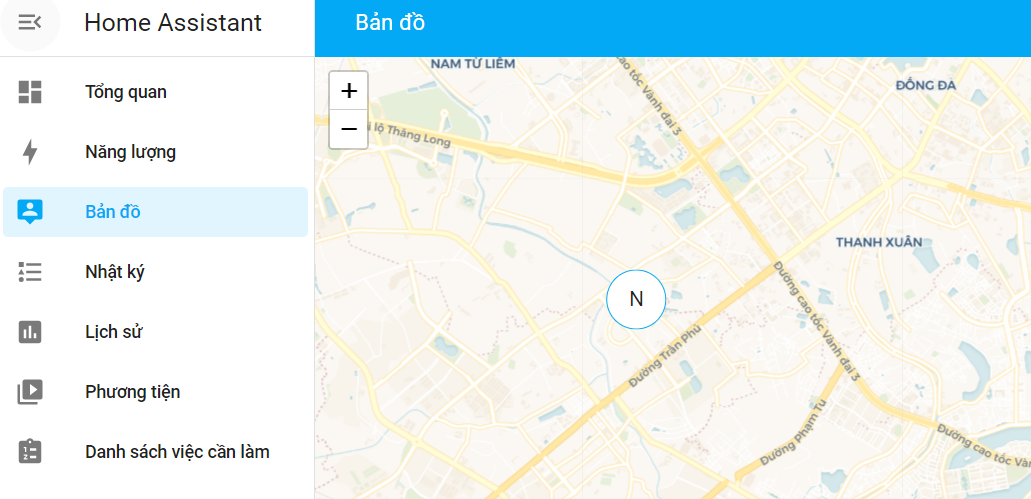
Map
- Display map + Tracker Drive to track and view location, record location
To-do list
- Add, edit, delete tasks and jobs

Status
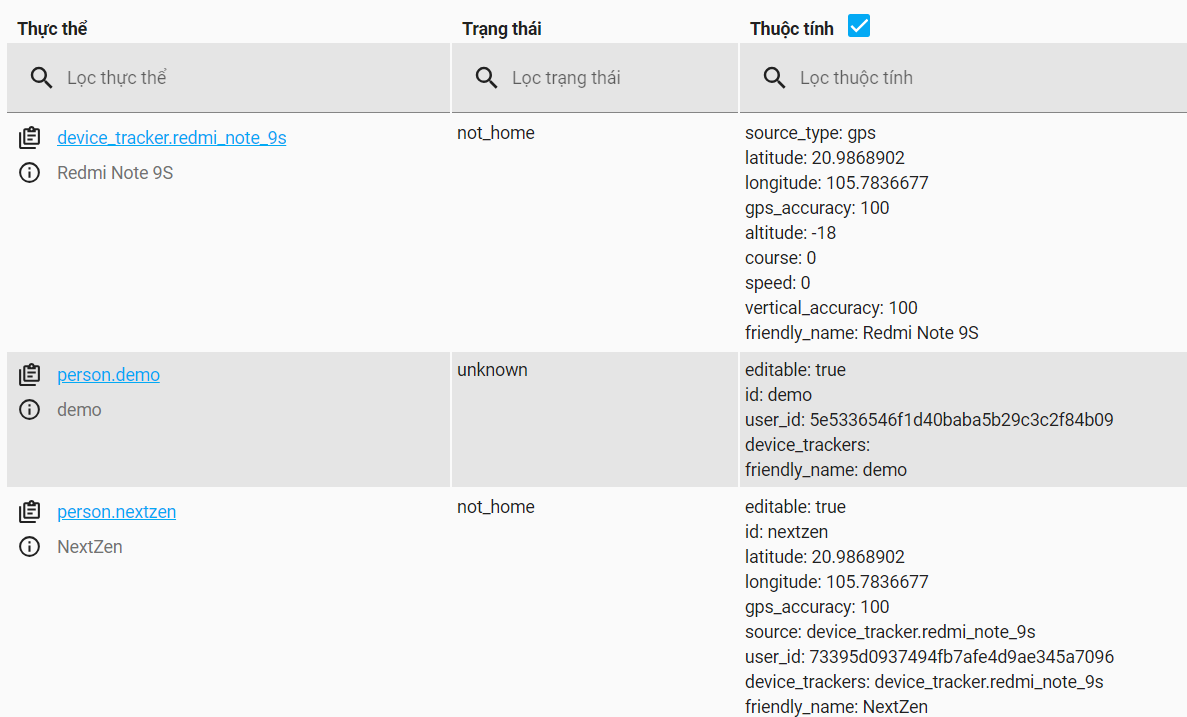
- Select Developer Tools -> Status
- Purpose: Show all the devices you have and all the statuses they have
Template
Purpose: In Home Assistant, templates are used to calculate values based on various information and control devices based on conditions. There are several ways to use templates in Home Assistant, including calculating values for sensors, controlling smart devices, creating virtual states, and more.

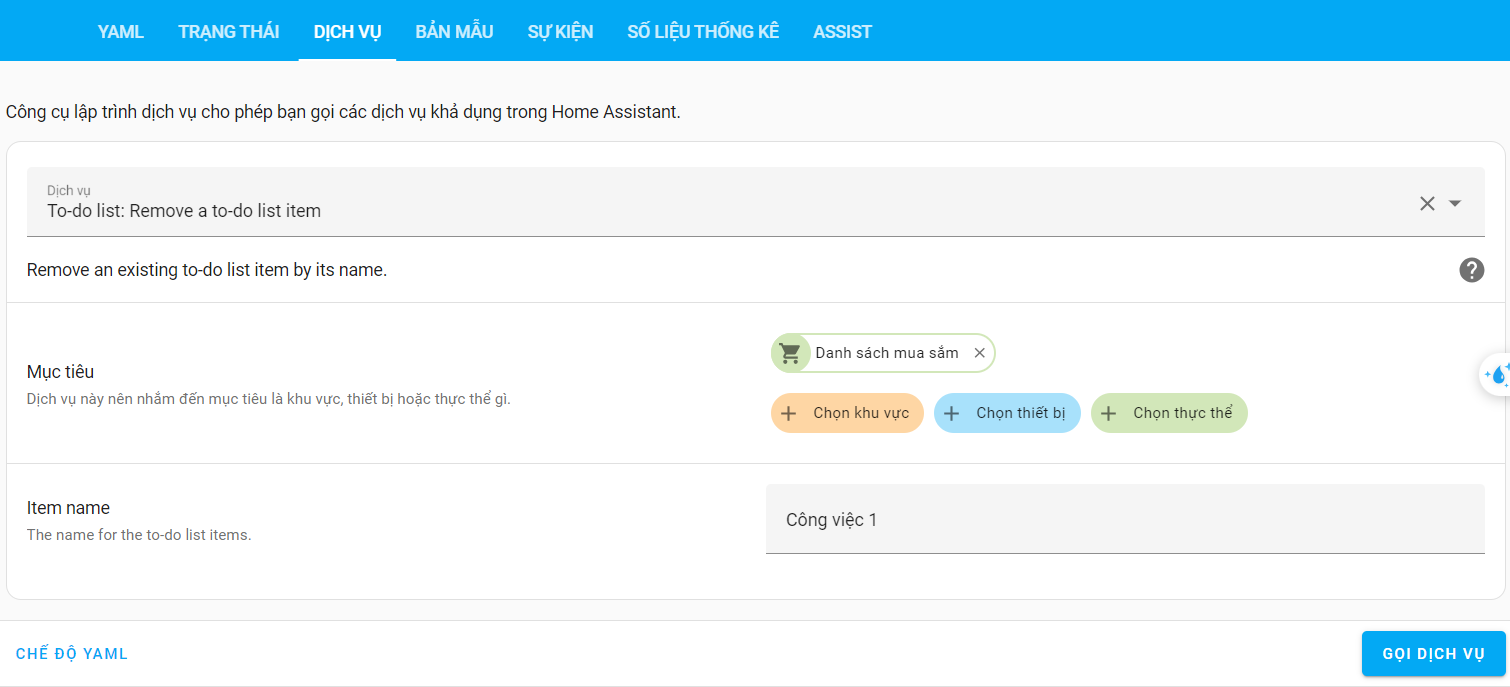
Service
- When you connect to a certain device, services will be provided. And you can fully control the devices and functions
- ex: Call service to delete 1 Item To-do: Task 1
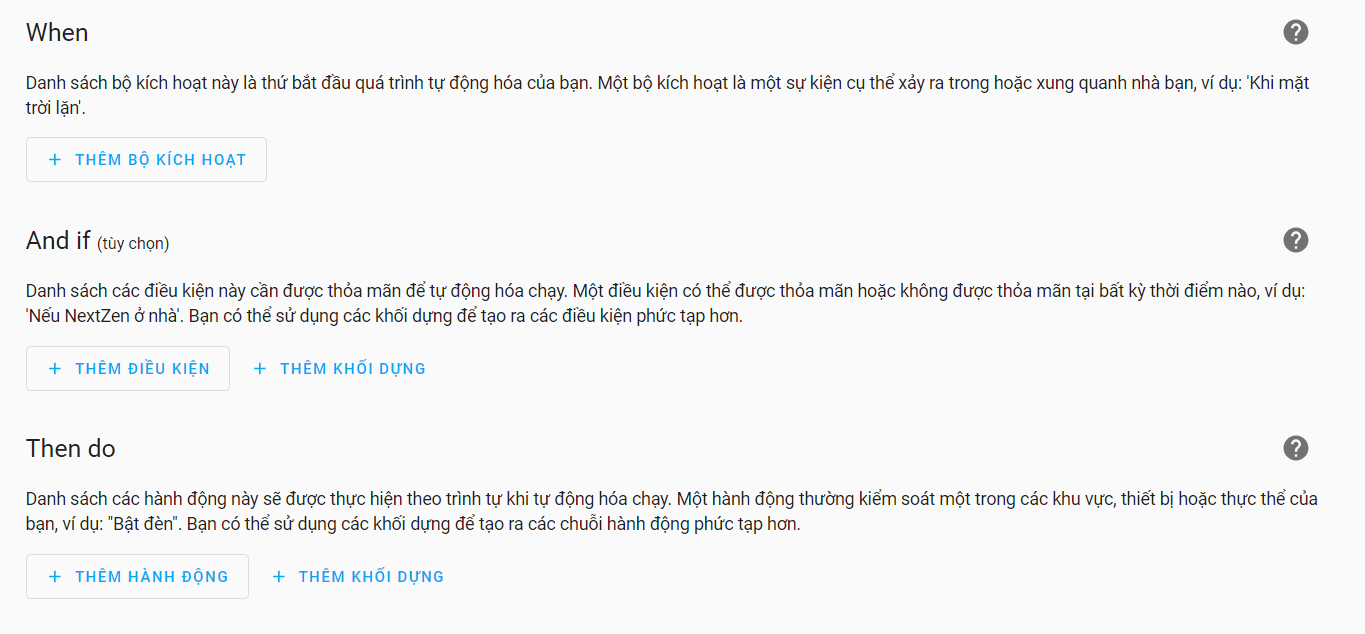
Automation
You can install and set up devices automatically without having to perform any operations
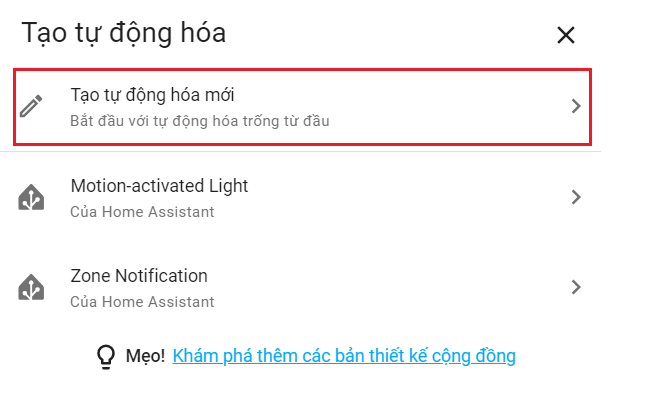
- Step 1: Select settings -> Automations and scenes -> +Create automation
- Step 2: Select Create new automation
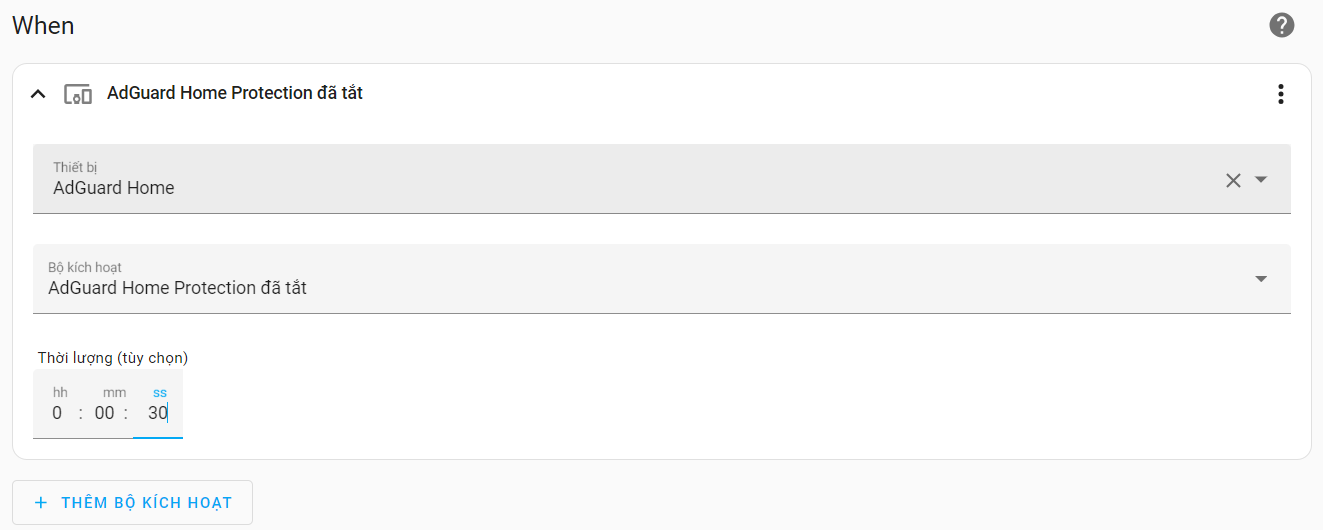
- Step 3: Add triggers to your devices
Ex: I will install an activator for AdGuard Home Protection that will automatically turn on after 30 seconds when it is turned off
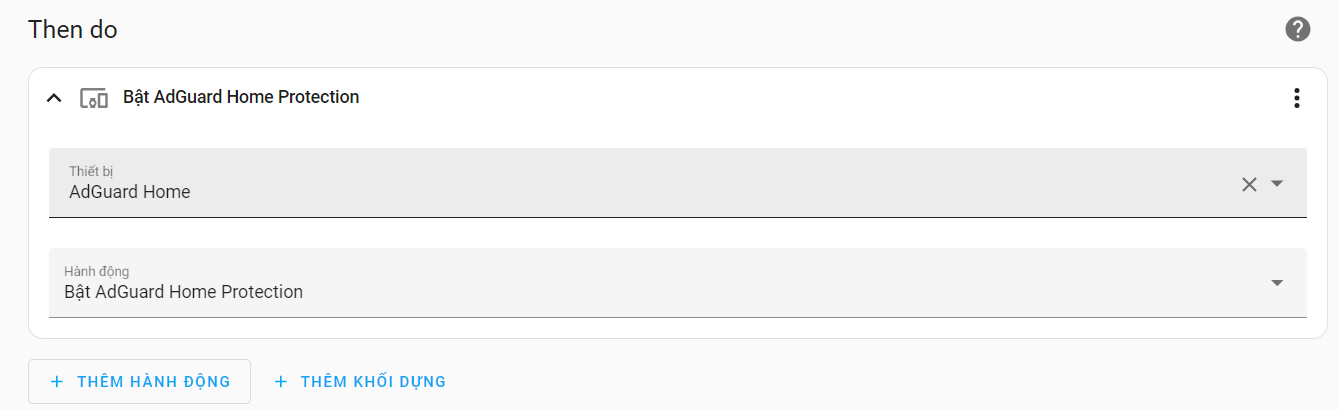
- Step 4: Save and complete an activation set
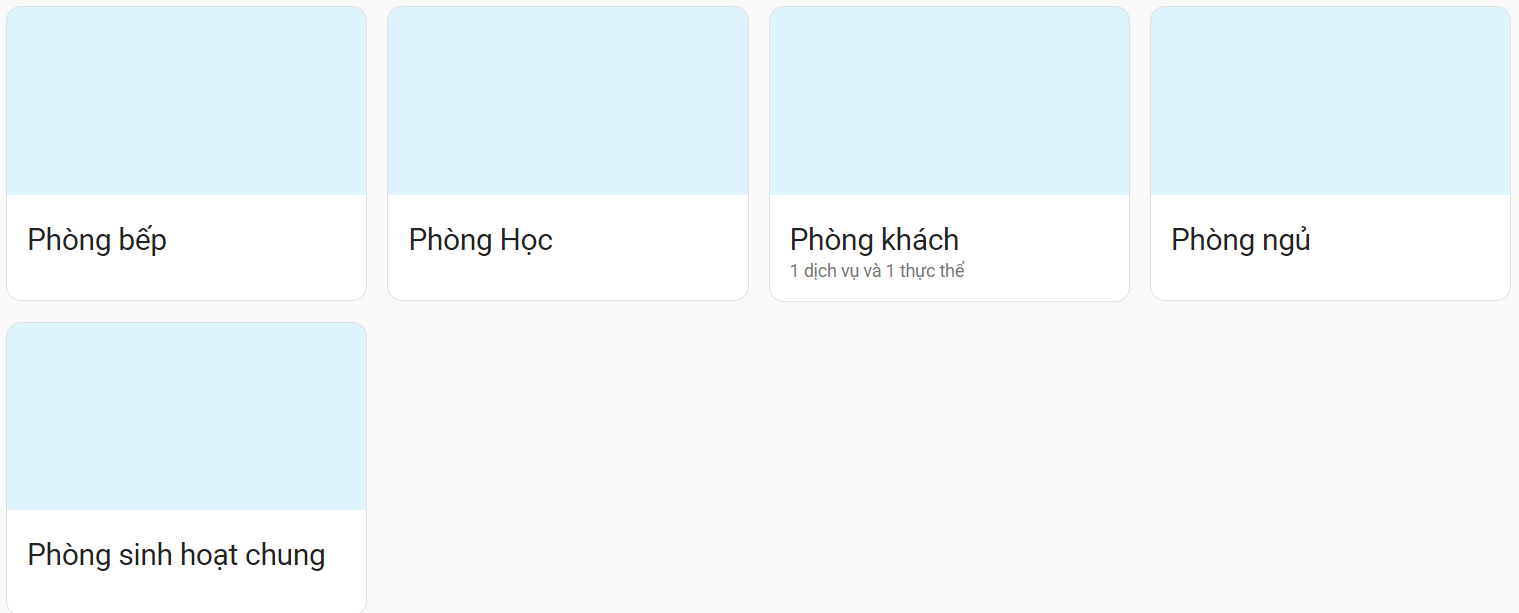
Areas and regions
ex: Add region
- Step 1: Select settings -> Regions & regions -> +Create region
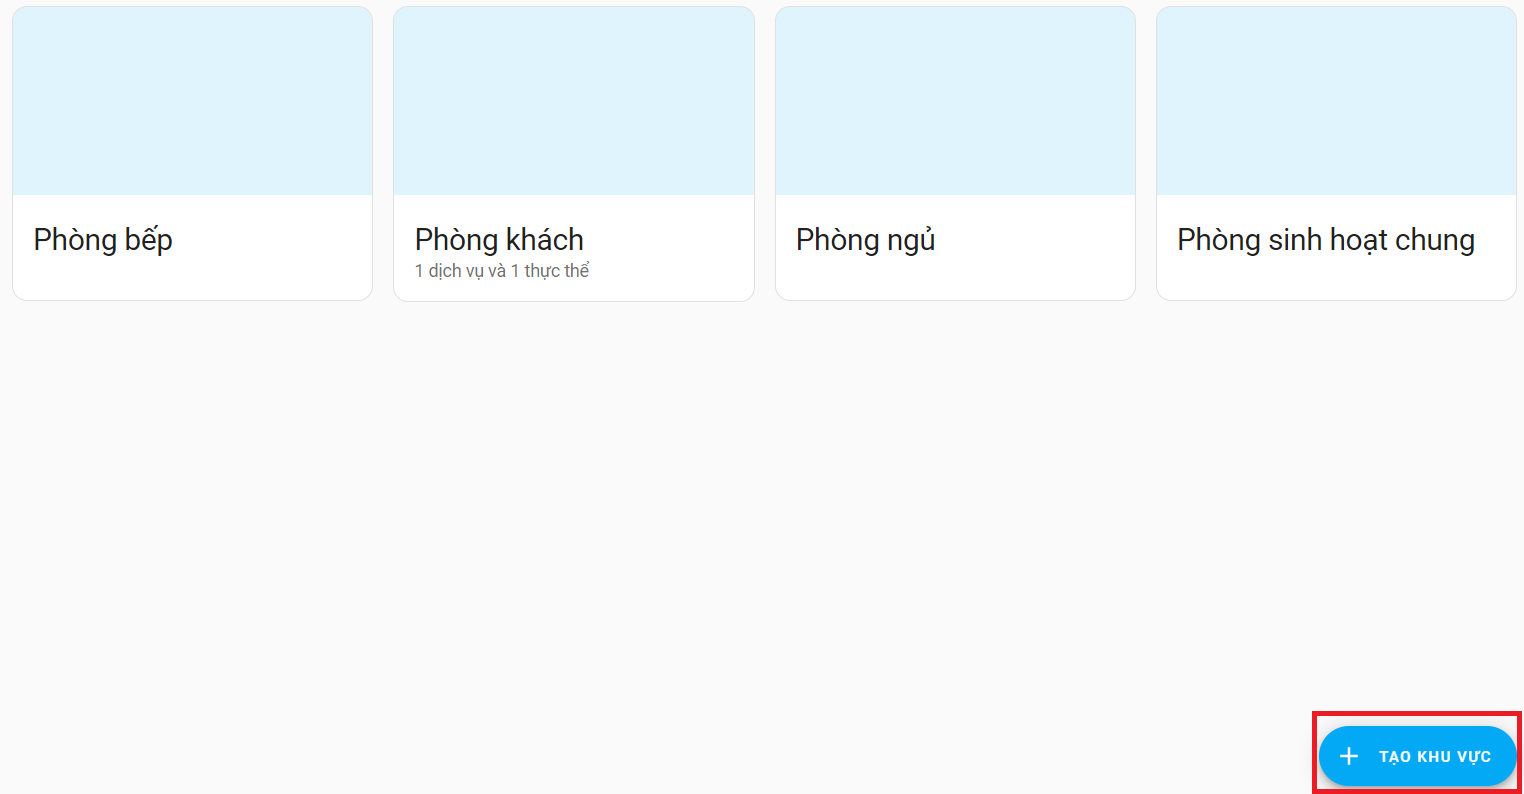
- Step 2: Fill in the necessary information
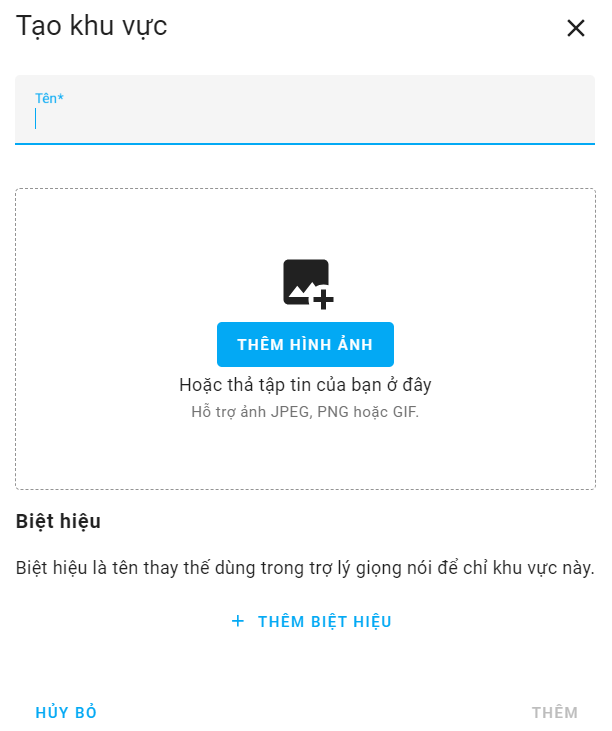
- Step 3: Select Add and the interface displays
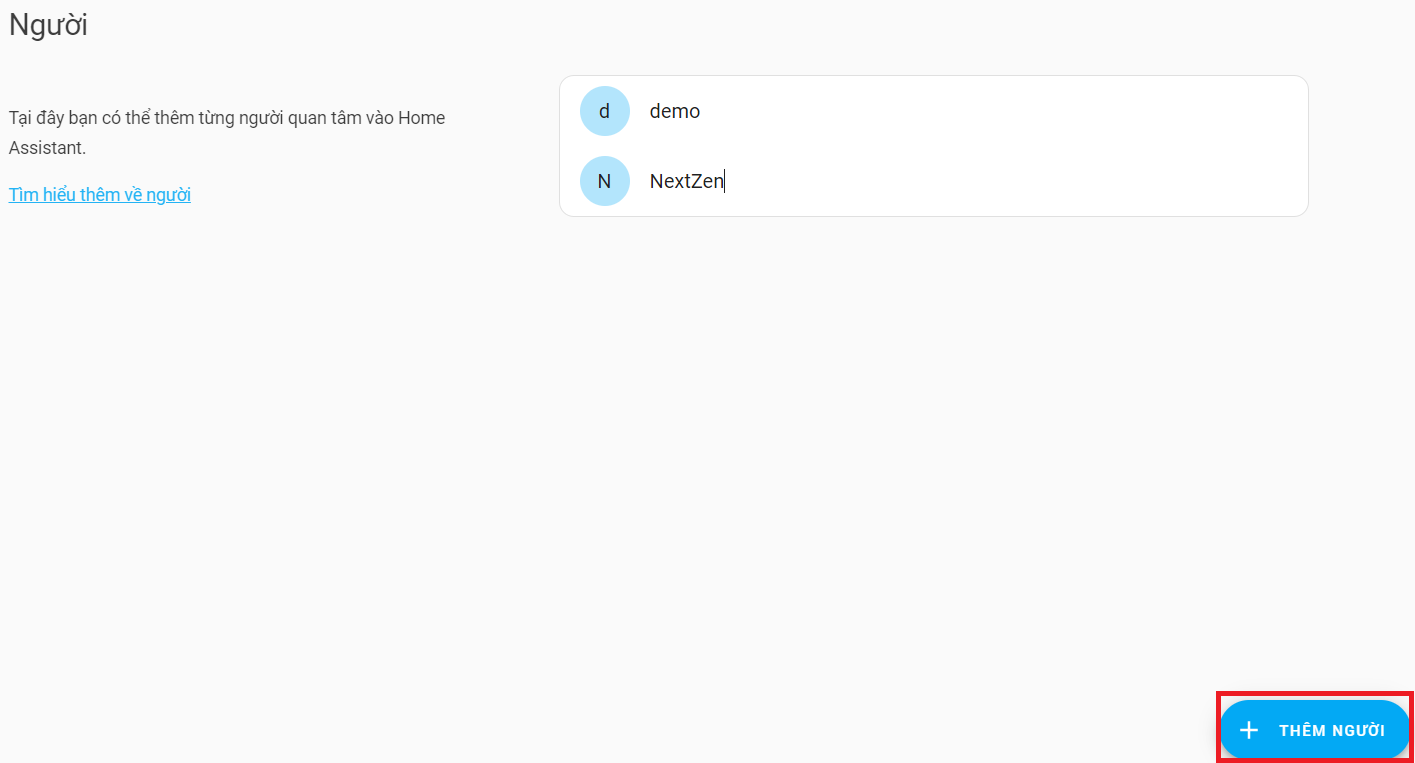
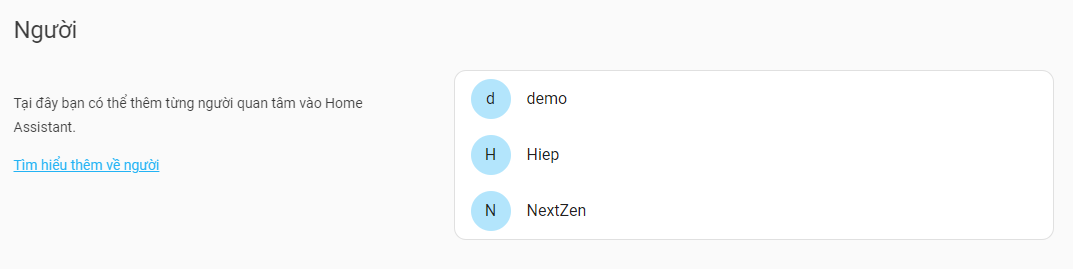
Add new user
- Step 1: Select settings -> People -> +Add person
- Step 2: Fill in the information
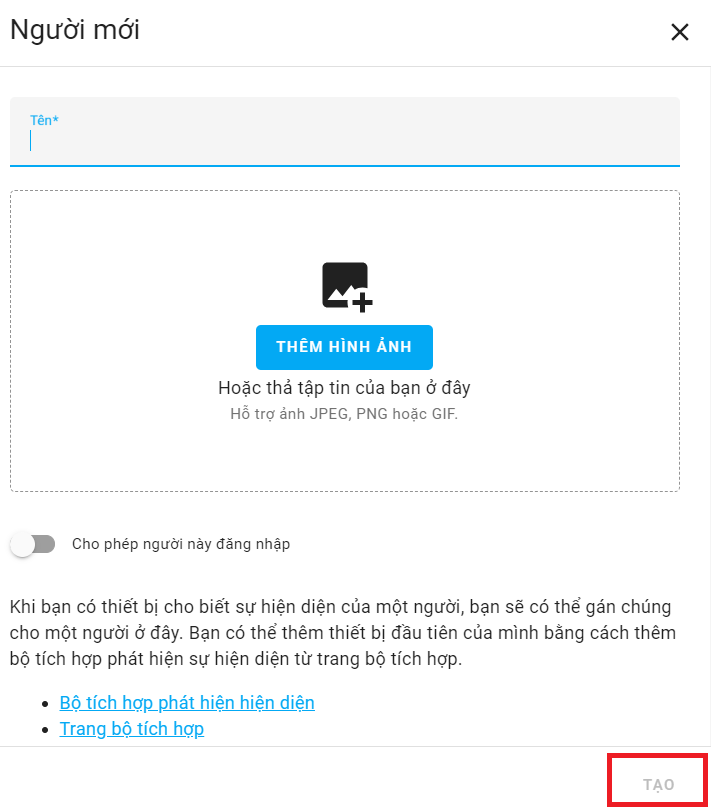
- Step 3: Create an account and choose to allow this person to log in to grant login and administrative rights -> Create
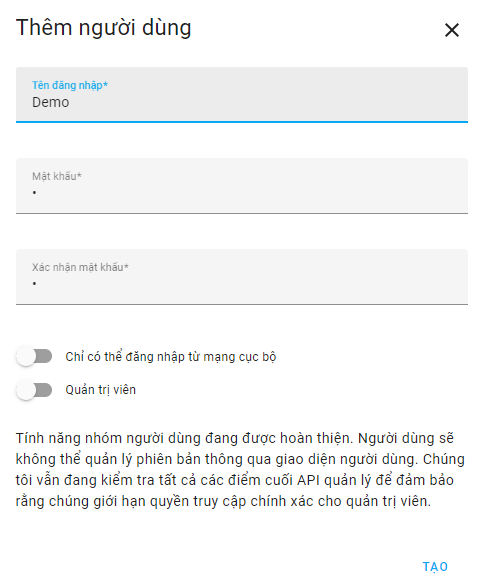
- Step 4: The interface displays system management accounts
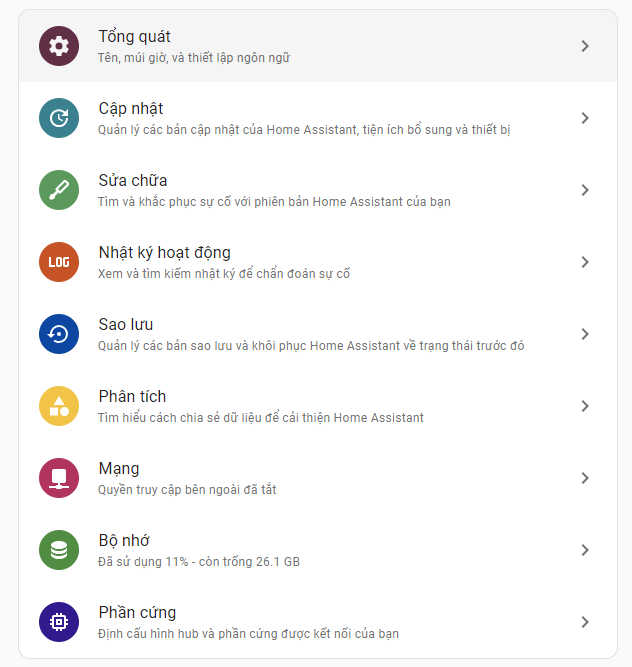
System installation
- You can change Name, Timezone, memory management, activity log, hardware...
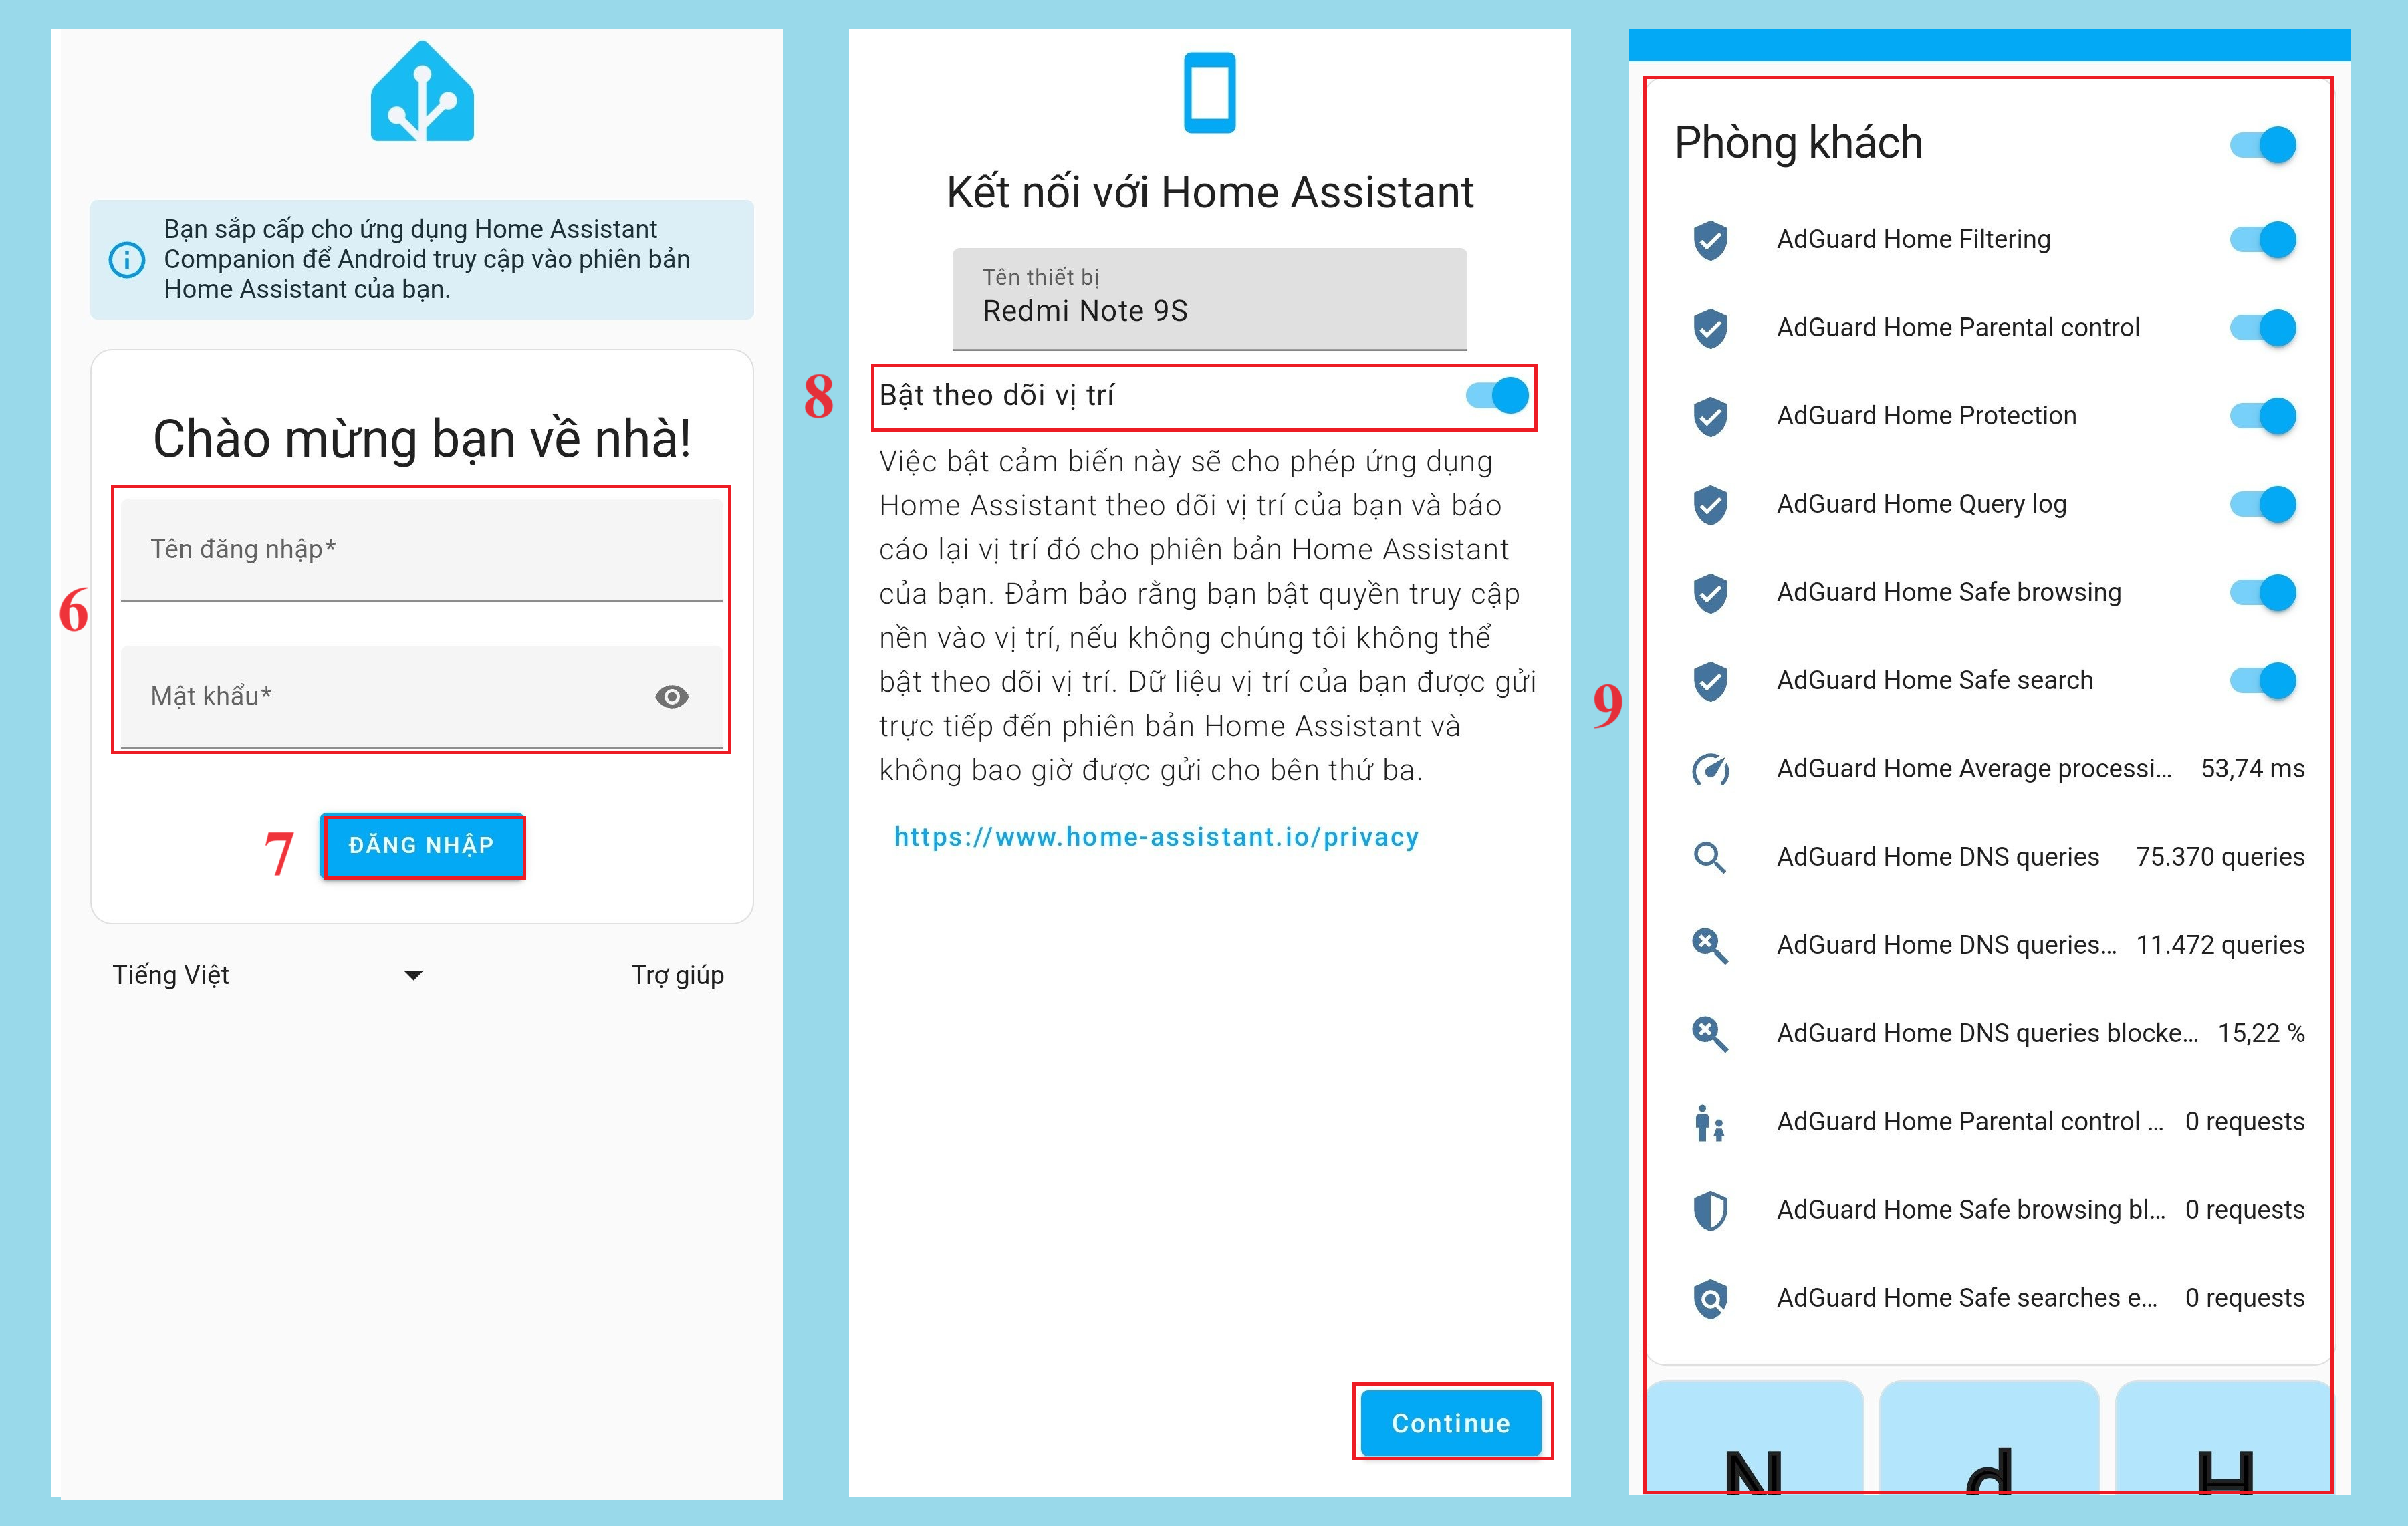
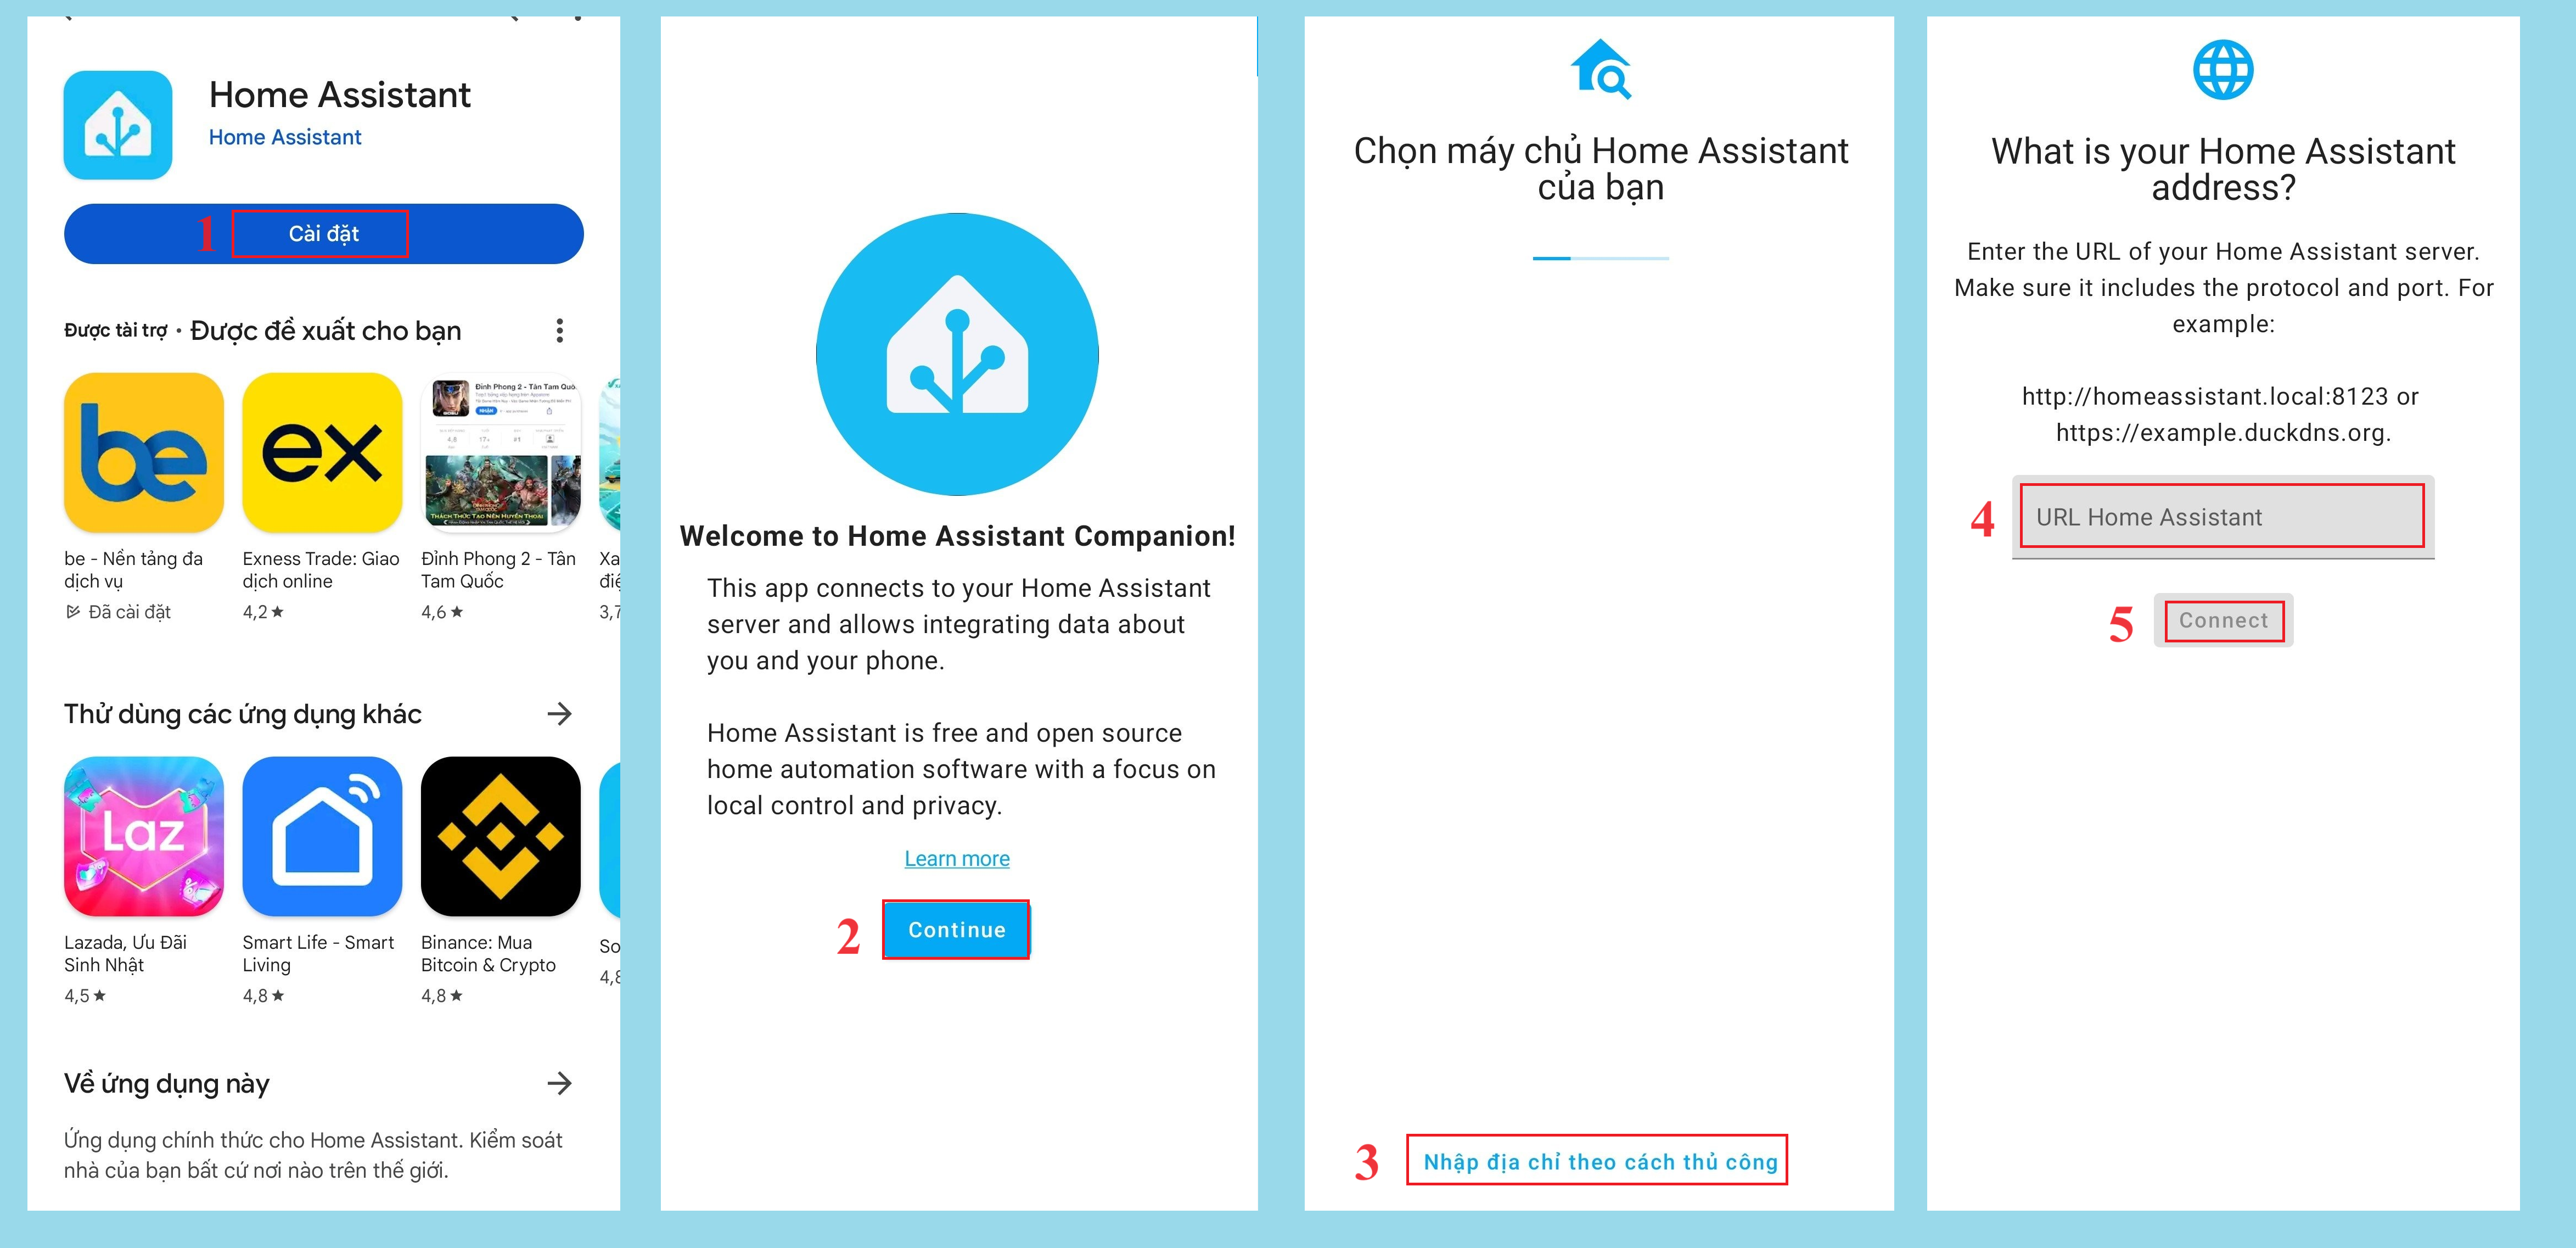
Install and connect on phone
- Step 1: Go to App CHPlay and search: Home Assistant -> Settings
- Step 2: Go to App Home Assistant -> Continue
- Step 3: Click enter address manually
- Step 4: Enter URL of Home Assistant Server
- Step 5: Click Connect
Step 6: Enter login information
Step 7: Click the Login button
Step 8: Turn on location tracking -> Continue
Step 9: Successfully logged in, the Home Assistant interface is displayed